Athena to read IoT data (part 2)
Introduction
This is a second post related to processing IoT data levaraging AWS Analytics services. In previous post we have created an AWS infrastructure to consume IoT Data. This time we will build an IoT device simulator that will connect to MQTT gateway exposed in the AWS account and publish meteo data.
Prerequisites
- Infrastructure created in previous post
- NodeJS to develop and run a thing simulator
- Basic TypeScript and NodeJS knowledge
Project setup
- Create an empty typescript project by running following commands:
- mkdir meteo-station
- cd meteo-station
- npm init -y
- npm install typescript @types/node ts-node --save-dev
- npx tsc --init --rootDir src --outDir build --target esnext
- The above set of commands should have created an empty typescript project. Our starting point for the app would be
./src/index.ts. In that case we need to add a script to compile it an run. Edit package.json and add the below command toscriptssection.
"dev": "npx ts-node ./src/index.ts"
-
Create a start point for our application by running commands:
- mkdir src
- touch src/index.ts
-
Add example content to src/index.ts
console.log("Hello world!")
-
Run the app with
npm run dev.If you can see Hello world in the console, it means that your
Typescriptproject is ready and we can start building a solution on top of it. -
But before we go to the next section, we need to add a couple of more dependencies (sdk to connect to IoT Core and some cron lib to send the data periodically).
- npm install aws-iot-device-sdk-v2 cron node-cron
- npm install @types/cron --save-dev
MQTT Connection
Let's start with creating an utility class that would be able to establish an mqtt connection. Create an empty mqtt.ts file in ./src/utils directory and export a function createMqttConnection with following content:
// ./src/utils/mqtt.ts

import { iot, mqtt } from "aws-iot-device-sdk-v2";

export const createMqttConnection = (
  endpoint: string,
  clientId: string,
  rootCaPath: string,
  certFilePath: string,
  keyFilePath: string
): mqtt.MqttClientConnection => {
  console.log(`Creating a new mTLS connection to ${endpoint} for client=${clientId}`);

  const mtlsBuilder = iot.AwsIotMqttConnectionConfigBuilder.new_mtls_builder_from_path(certFilePath, keyFilePath);

  mtlsBuilder.with_endpoint(endpoint);
  mtlsBuilder.with_certificate_authority_from_path(undefined, rootCaPath);
  mtlsBuilder.with_clean_session(false);
  mtlsBuilder.with_client_id(clientId);

  return new mqtt.MqttClient().new_connection(mtlsBuilder.build());
};
The function will create a new connection for a given thing to a requested endpoint using provided set of X.509 details (certificate, private key and a CA root certificate). The thing certificate and a private key were generated for your thing by a terraform script, but when it comes to the CA root certificate, you need to download the one from amazon trust service.
The function itself does not require any comments. Basically, we are using AWS SDK functionality to create new MQTT connection. We do not need any topics here yet, it is just a pure connection. Having it open, we will be able to publish messages on a requested topic.
Sensor data
The next step would be related to defining a data model for our device. Let's assume we want our meteo station to publish data from a few sensors (like temperature, humidity, atmospheric pressure) and with different units (C, F, mb, mmHg, etc).
To meet the requirements, we could define a meteo sensor in a following way:
// ./src/iot/types.ts

export class Sensor {
  constructor(
    public readonly name: string, // sensor type (e.g. temperature)
    public readonly unit: string, // unit (e.g. F)
    private readonly min: number, // min value to set a range for random
    private readonly max: number  // max value to set a range for random
  ) {}

  // will return random value from min-max range
  get value() {
    return Math.floor(Math.random() * (this.max - this.min + 1) + this.min);
  }
}
We will use a sensor values as a part of payload that will be published from our device. The paylod will also contain thing identifier and the timestamp when the values were collected.
// ./src/iot/types.ts

export interface Payload {
  deviceId: string;
  timestamp: number;
  values: Partial<Sensor>[];
}
We defined values as a Partial type of Sensor as we do not need to publish min/max values.
Thing connection
Now, we will implement ThingConnection class. Its responsibility would be to establish mTLS connecion using its own certificate/key and publish messages on its own topic. Let's start with defining the content:
// ./src/iot/iot-device.ts

import { mqtt } from "aws-iot-device-sdk-v2";
import { createMqttConnection } from "../utils/mqtt";

export class ThingConnection {
  private topic: string; // topic to publish messages on

  private clientConnection: mqtt.MqttClientConnection; // mqtt connection

  constructor(
      certDir: string,          // directory where the key and cert is stored
      endpoint: string,         // mqtt gateway endpoint
      deviceGroup: string,      // device group
      readonly thingId: string  // thing id
  ) {
    this.topic = `devices/${deviceGroup}/${this.thingId}`; // build a topic name
    this.clientConnection = this.setupMqttConnection(certDir, endpoint); // create a connection
  }

  /**
   * Creates device mqtt connection
   */
  private setupMqttConnection = (certDir: string, endpoint: string) =>
    createMqttConnection(
      endpoint,
      this.thingId,
      `./root-ca.crt`,
      `${certDir}/${this.thingId}/cert.pem`,
      `${certDir}/${this.thingId}/private.key`
    );
}
So far we have create an mqtt connection (but did not connect yet) and defined a topic the messages will be published on. Now, we need to add two more functions (both part of ThingConnection class).
One to connect to the endpoint:
  // ./src/iot/iot-device.ts

  connect = async () => {
    await this.clientConnection.connect();
    console.log(`Thing ${this.thingId} connected succesfully`);
  };
and the other one to publish a paylod.
  // ./src/iot/iot-device.ts

  publish = async (payload: string) => {
    console.debug(`Thing ${this.thingId} is publishing results: ${payload}`);
    return this.clientConnection.publish(this.topic, payload, mqtt.QoS.AtLeastOnce);
  };
We'd like to see some debug information when new payload is being published.
And that would be all for the ThingConnection class. It meets all the requirements we defined above.
Meteo station
The next thing to define would be a MeteoStation class capable of sending periodically meteo sensor values. It would require a thing connection as well as a set of Sensor to publish values for.
  // ./src/iot/iot-device.ts

export class MeteoStation {
  constructor(
    private readonly connection: ThingConnection, // thing connection
    private readonly sensors: Sensor[] // sensors to publish values for
  ) {}

  start = async () => {
    await this.connection.connect();
    this.createScheduler().start();
  };

  private createScheduler = () =>
    new CronJob("0 */5 * * * *", async () => {
      await this.publishCurrentValues();
    });
}
On start the MeteoStation will establish a connection with mqtt gateway and start a scheduler. The scheduler will call publishCurrentValues method every 5 minutes (based on the cron expression) to send to meteo value.
Now, it's time to implement publishCurrentValues method:
  // ./src/iot/iot-device.ts

  private publishCurrentValues = async () => {
    const payload: Payload = {
      deviceId: this.connection.thingId,
      timestamp: new Date().getTime(),
      values: this.sensors.map((sample) => {
        return {
          name: sample.name,
          unit: sample.unit,
          value: sample.value,
        };
      }),
    };
    return this.connection.publish(JSON.stringify(payload));
  };
We create a Payload object with all the reqired data. For every sensor we attach the sensor type, unit and the current value (in our case a random one from a range we have defined). The Payload is serialized to string and send to thing's topic.
Testing
Now, it's time to putting all together to see how it works and produce some data for further steps.
Go back to our app's starting point (index.ts) and define a few const:
  // ./src/index.ts

import { MeteoStation, ThingConnection } from "./iot/iot-device";
import { Sensor } from "./iot/types";

const ENDPOINT = "<< PUT YOUR MQTT ENDPOINT HERE >>"; // IoT/MQTT gateway endpoint
const THING_GROUP = "meteo-station"; // thing group
const CERT_DIR = "./cert"; // location were we put the cerificates and keys

// sensor types
const THERMOMETER = "Temp";
const BAROMETER = "Bar";
const HUMIDITY = "Humidity";

const createMeteoStation = (thingId: string, sensors: Sensor[]) => {
  const connection = new ThingConnection(`${CERT_DIR}/${THING_GROUP}`, ENDPOINT, THING_GROUP, thingId);
  return new MeteoStation(connection, sensors);
};
createMeteoStation is a MeteoStation factory method. It will create new instance of it.
Let's define a meteo-001 thing:
  // ./src/index.ts

const thing1 = createMeteoStation("meteo-001", [
  new Sensor(THERMOMETER, "C", 0, 30),
  new Sensor(BAROMETER, "mb", 900, 1100),
  new Sensor(HUMIDITY, "%", 20, 100),
]);
and meteo-002 that will publish data in different units:
  // ./src/index.ts
const thing2 = createMeteoStation("meteo-002", [
  new Sensor(THERMOMETER, "F", 32, 100),
  new Sensor(BAROMETER, "mmHg", 675, 825),
  new Sensor(HUMIDITY, "%", 20, 100),
]);
And the last, but not least - we need to start both things:
  // ./src/index.ts
thing1.start().then(() => console.log("Thing1 started"));
thing2.start().then(() => console.log("Thing2 started"));
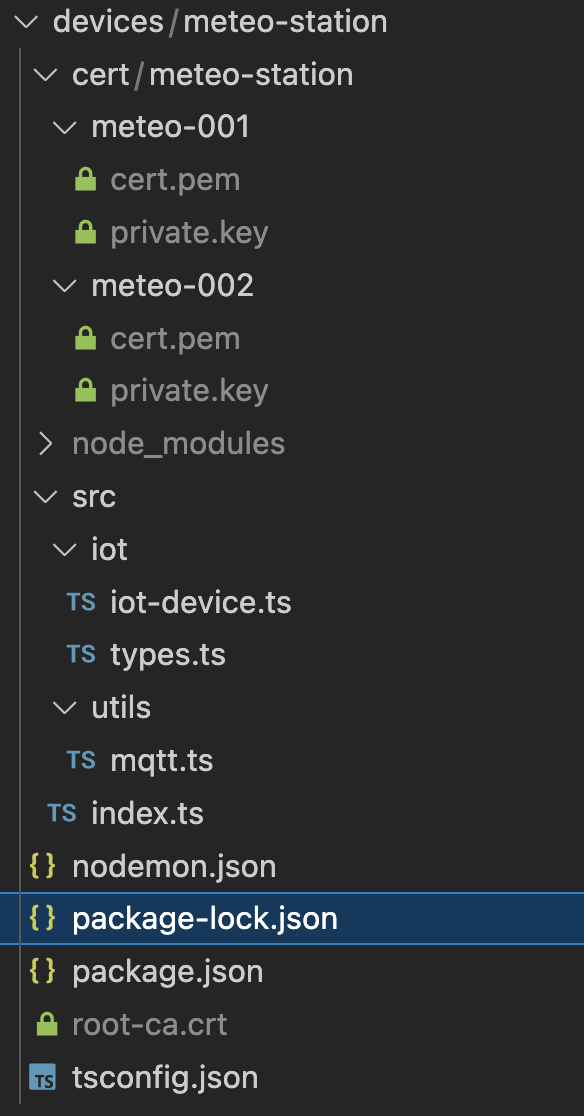
Before you start the simulator, make sure you have all static resources prepared. You need to put the files created by terraform script to ./cert directory as well as root-ca.crt (downloaded from amazon trust service - PEM file) in the root directory of the project.
If you have all ready, it's time to start the simulator. Run the simulator with npm run dev and you should see:
Creating a new mTLS connection to xxxxx-ats.iot.eu-west-1.amazonaws.com for client=meteo-001
Creating a new mTLS connection to xxxxx-ats.iot.eu-west-1.amazonaws.com for client=meteo-002
Thing meteo-001 connected succesfully
Thing1 started
Thing meteo-002 connected succesfully
Thing2 started
and after every 5 minutes, new data published to the topics:
Thing meteo-001 is publishing results: {"deviceId":"meteo-001","timestamp":1677340800002,"values":[{"name":"Temp","unit":"C","value":2},{"name":"Bar","unit":"mb","value":928},{"name":"Humidity","unit":"%","value":69}]}
Thing meteo-002 is publishing results: {"deviceId":"meteo-002","timestamp":1677340800003,"values":[{"name":"Temp","unit":"F","value":39},{"name":"Bar","unit":"mmHg","value":796},{"name":"Humidity","unit":"%","value":41}]}
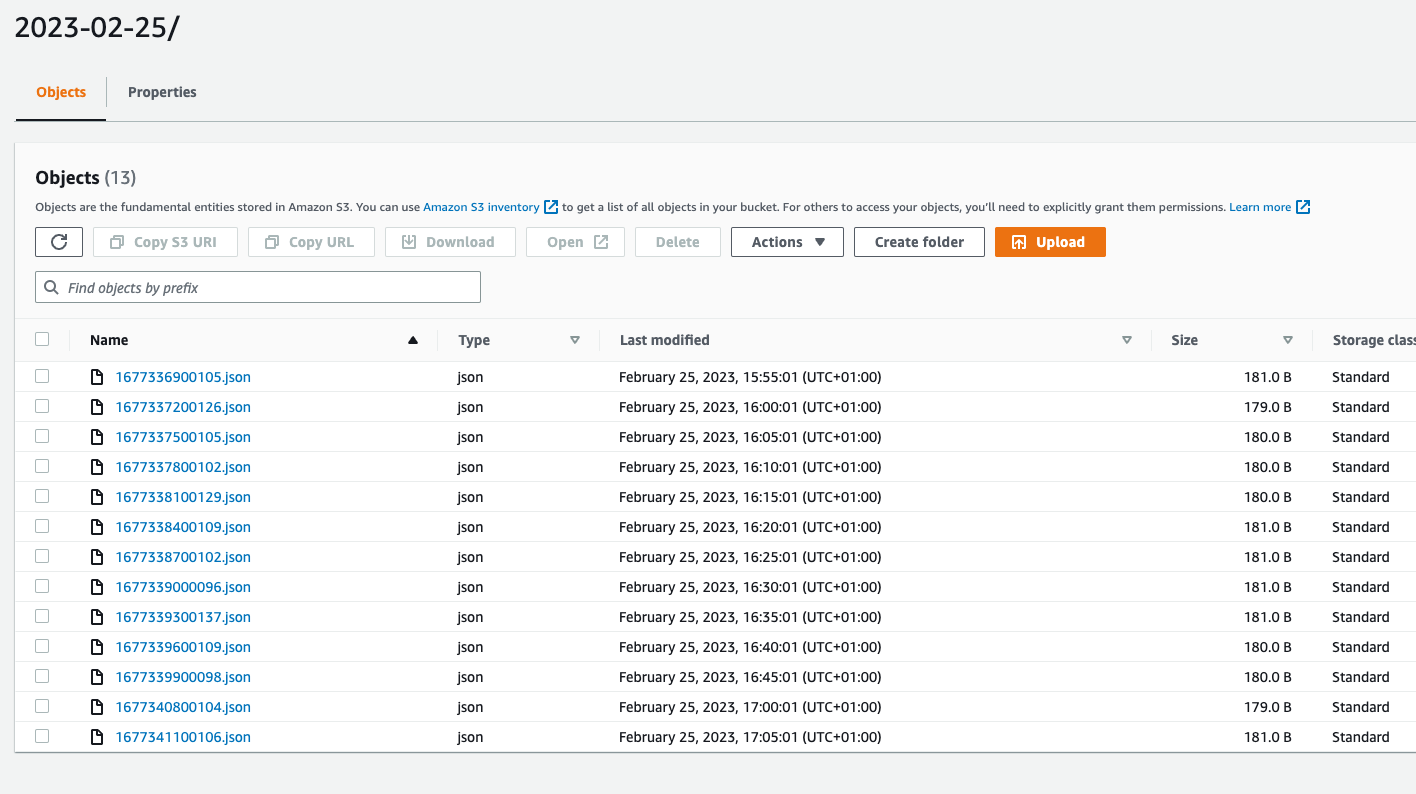
Also, you can go to AWS console to make sure our rule we created in the previous step is still working and the raw files are stored in S3.
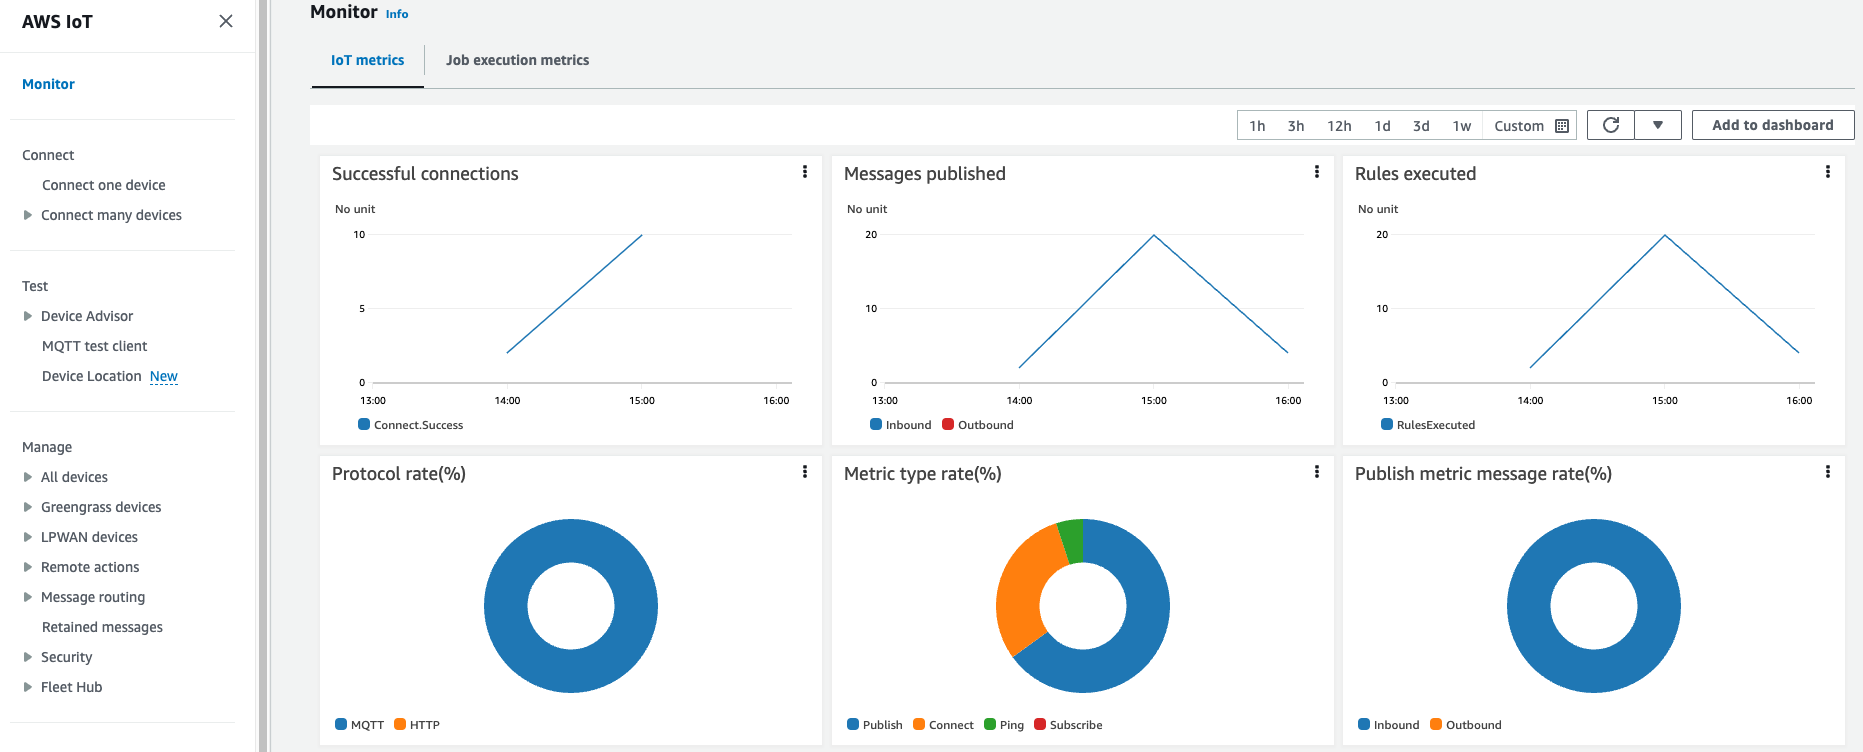
And some metrics from IoT console:
Ale the code is available in github
Next steps
A couple of things to highlight
- A payload send by the simulator is relatively small, up to 200B. In real life it would much larger, but still not large enough to be efficiently handled by Athena. For Athena, files with the size less than 128 MB are consider small and not efficient.
- Simulators send data in different format, which might get further analysis complicated and not efficient
To make our life easier, we will use ETL jobs to transform, merge, compress our data so that Athena can handle them more efficient. Bear in mind that we have only testing/simulated data, so we will not be able to produce 100 or 200 MB files, but we will discover techniques to merge files and controle the number or size the output files.